
Looking your best in a suit is all about the perfect fit, and it all starts with measurements, made easy with four simple words: over, chest, waist and in. Let us show you how to take suit measurements!
Before You Measure: Gather Your Tools
Before you begin the process of learning how to take suit measurements, setting up your space correctly is key to getting accurate results. Find a well-lit room with a full-length mirror so you can see what you’re doing. You will need a few essential tools: a flexible fabric measuring tape (not a metal one from a toolbox), and a notepad and pen or your phone to record the numbers. It’s also highly recommended to have a helper, as measuring yourself can be tricky, especially for areas like the shoulders and back. For the most precise suit measurements, wear thin, form-fitting clothing like a t-shirt and underwear. Stand up straight in a relaxed, natural posture—don’t puff out your chest or suck in your stomach. As you measure, ensure the tape is always held snug against the body but not tight enough to create an indent, and always keep it parallel to the floor.
How to Measure for a Suit: Step-By-Step Summary
- Overarm/Shoulders: With arms at your sides, wrap the tape around the broadest part of your shoulders and chest. Common Mistake: Hunching or raising your arms. Pro Tip: This measurement helps determine the right jacket size for broader builds.
- Chest: Lift your arms, wrap the tape around the fullest part of your chest, then lower your arms. Common Mistake: Puffed out chest or holding the tape too loosely. Pro Tip: Place one finger between the tape and your body to ensure enough room for comfort.
- Waist: Measure around your natural waistline, typically just above your belly button where your body creases when you bend sideways. Common Mistake: Measuring over a thick belt or where you wear your jeans. Pro Tip: Suit trousers sit higher than casual pants, so finding your true waist is crucial.
- Seat/Hips: Wrap the tape around the fullest part of your hips and buttocks. Common Mistake: Not measuring the widest point. Pro Tip: Empty your pockets before measuring to avoid skewed numbers.
- Sleeve: Start the tape at the shoulder seam, run it down your arm, and end at your desired length, usually about an inch past your wrist bone. Common Mistake: Bending the arm too much or too little. Pro Tip: Keep a slight, natural bend in your elbow for the most accurate sleeve length.
- Inseam: Measure from the crotch seam of a well-fitting pair of pants down to the hem. Or, measure from your own crotch down to where you want the pants to end. Common Mistake: Measuring without shoes on. Pro Tip: Your desired “break” (how much the pant leg folds over your shoe) will affect this number.
- Jacket Length: Measure from the base of the back of your neck down to where you want the jacket to end, typically around your thumb’s knuckle when your arms are relaxed at your sides. Common Mistake: Measuring from the top of the collar. Pro Tip: A classic jacket length should just cover the seat of your trousers.
- After completing these steps for how to measure for a suit, always double-check your numbers to ensure accuracy before you shop or order.

Overarm/Shoulders
The first step to getting the perfect fit is the overarm measurement. Wrap the tape around the arms and run it across the widest part of the chest. As always, keep the tape snug and parallel to the ground.

Chest
Wrap the tape under the arms and across the widest part of the chest. Nice and simple, you’re halfway to having a complete suit measurement.
Measuring the Jacket: Shoulders, Chest & Sleeve Length
Understanding how to measure for a suit jacket is critical for achieving a sharp silhouette. Start with the shoulder width by measuring across your back from the end of one shoulder bone (the acromion) to the other. A well-fitting jacket’s shoulder seam should sit directly on this point. Next, for the jacket chest, measure around the fullest part of your chest, under your armpits. Ensure the tape is level and you can fit one finger comfortably underneath. For the sleeve length, let your arm hang naturally with a slight bend. Measure from the shoulder seam down the arm to about one inch past your wrist bone, allowing about a half-inch of shirt cuff to show. Finally, the jacket length is measured from the base of your neck (below the collar) down to where your fingertips end when your arms are relaxed at your sides. These suit measurements directly correlate to jacket sizes; for example, a 40-inch chest measurement typically corresponds to a size 40 jacket.

Waist
The waist measurement requires wrapping the tape above the waist and just below the naval. Remember, suit pants are worn right below the navel, unlike how you may wear your everyday chinos or jeans.
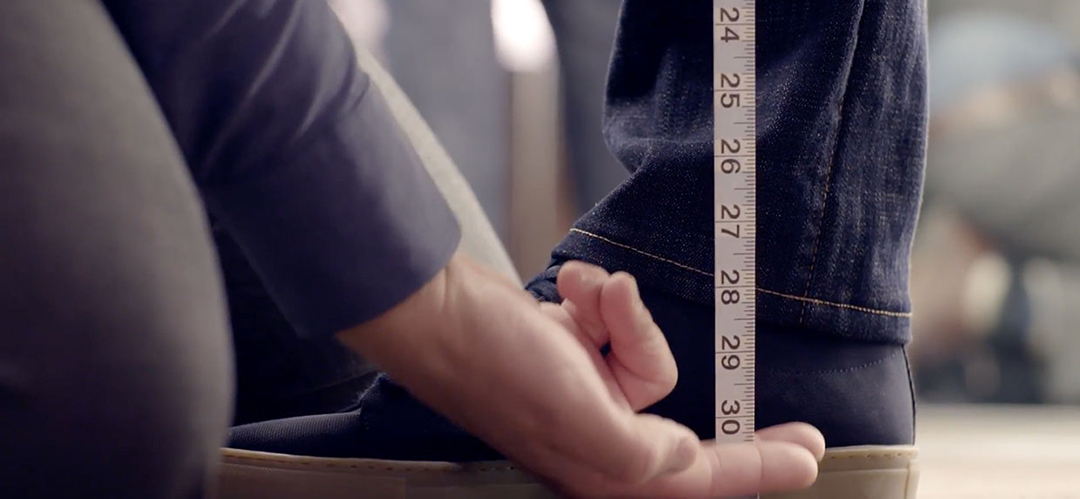
In
Your inseam measurement ensures your pants are the right length. Take the tape from the crotch down to where the heel meets the insole of the shoe.
How Should a Suit Fit? Quick Fit Checkpoints
- Shoulders: The jacket’s shoulder seams should end exactly where your natural shoulders do. A red flag is a divot or bunching, meaning it’s too big.
- Torso: When the top button is fastened, the lapels should lie flat. If you see an “X” shape forming from pulling fabric, the jacket is too tight. A gap between your shirt collar and the jacket collar (a “collar gap”) means it needs alteration.
- Sleeves: Jacket sleeves should end just above the wrist bone, showing about a half-inch of your shirt cuff. This is an easy alteration for a tailor.
- Trouser Waist: Pants should sit comfortably on your natural waist without needing a belt to hold them up. If they are too loose or tight, this is a simple tailoring fix.
- Trouser Seat & Leg: The fabric should drape smoothly over your seat. If you see horizontal wrinkles, it’s too tight; if it’s baggy, it’s too loose. The leg should have a clean line without being skin-tight. Minor fit issues can be tailored, but significant pulling or bagginess may require a different size.
Suit Size Chart by Measurements
| Suit Size (Jacket) | Chest (in) | Waist (in) |
|---|---|---|
| 36 S/R/L | 35-36.5 | 29-30 |
| 38 S/R/L | 37-38.5 | 31-32 |
| 40 S/R/L | 39-40.5 | 33-34 |
| 42 S/R/L | 41-42.5 | 35-36 |
| 44 S/R/L | 43-44.5 | 37-38 |
| 46 S/R/L | 45-46.5 | 40-42 |
Note: This is a general guide. Sizes can vary by brand and fit. The letter (S, R, L) corresponds to height: Short (S) for 5’4″-5’7″, Regular (R) for 5’8″-6’0″, and Long (L) for 6’1″-6’4″. Minor deviations can often be corrected by a professional tailor at a place like Men’s Wearhouse.
How to Read Suit Sizes on Labels
Suit labels might seem cryptic, but they’re quite simple once you know the code. A typical jacket tag reads something like 40R. The number, ’40’, refers to the chest measurement in inches. The letter that follows indicates the jacket’s length, which corresponds to your height: ‘S’ for Short (for men up to 5’7″), ‘R’ for Regular (5’8″ to 6’0″), and ‘L’ for Long (6’1″ and up). You may also see ‘XL’ for Extra Long. Some brands offer different fits, denoted by words like SLIM or ATHLETIC, which change the suit’s contour without changing the core size. Trouser labels, like 32/32, are simpler: the first number is the waist measurement in inches, and the second is the inseam length. Understanding these codes is the first step to quickly finding a suit that’s close to your perfect fit off the rack.
Suit Size Calculator: Convert Numbers to Sizes
Measuring for a custom or bespoke suit is a far more detailed process than for an off-the-rack garment. While it covers all the basic suit measurements, it also requires several additional data points for a truly personalized fit. These often include measurements for your bicep (flexed and unflexed), wrist, thigh, and knee to ensure the suit drapes perfectly and allows for comfortable movement. Furthermore, a tailor will assess your posture. They may ask for photos of you from the front, back, and side to observe details like shoulder slope (e.g., square or sloped) and stance. When working with a remote tailor, it’s crucial to have a partner assist with these measurements and to use clear, well-lit photos. Always double-check and upload your numbers meticulously, as every fraction of an inch matters in creating a suit that is uniquely yours. For a foolproof result, asking yourself ‘where to get measured for a suit‘ often leads to the best answer: a professional tailor.
Using Your Measurements When Shopping for Suits
Once you have your accurate suit measurements, you can shop with confidence. When shopping online, always compare your numbers to the brand’s specific size chart, as fit can vary. Pay attention to the fit description—classic, slim, or athletic. If your measurements are between sizes, it’s usually better to size up, as it’s easier to tailor a suit smaller than to make it larger. Consider the fabric; materials with some stretch (like wool with a small percentage of elastane) offer more forgiveness. When trying on a suit in-store, use your measurements as a starting point but focus on the fit in the shoulders and chest, as these are the most difficult areas to alter. The waist and inseam are much easier for a tailor to adjust. Use your knowledge of how to measure for a suit not as a rigid rule, but as a powerful tool to guide you to the best possible starting garment for a perfect final fit.
There you have it. How to take suit measurements in four simple ways. Come into any Men’s Wearhouse store and our Master Tailors can help measure you for your perfect suit.